
🛒 Recommended gear on Amazon
Disclosure: some links above are affiliate links — if you buy through them I may earn a small commission at no extra cost to you. Thanks for supporting the channel!
Let’s Learn:
- What is Docker Swarm
- How to Configure Hosts
- How to Install and Run Docker Service
- How to Configure the Manager Node for Swarm Cluster Initialization
- How to Configure Worker Nodes to join the Swarm Cluster
- How to Verify the Swarm Cluster
- How to Deploy new Service on Swarm Cluster
Docker Swarm Features:• Cluster management integrated with Docker Engine
• Decentralized design
• Declarative service model
• Scaling
• Multi-host networking
• Service discovery
• Load balancing
• Secure by default
• Rolling updates
Prerequisites
For this tutorial, you’ll need:- A local machine with Docker installed. Your local machine can be running any Linux distribution, or even Windows or macOS. For Windows and macOS, install Docker using the official installer. If you have Ubuntu 16.04 running on your local machine, but Docker is not installed.
- Docker Machine installed on your local computer, which you’ll use to create three hosts. On Windows and macOS, the Docker installation includes Docker Machine.
About Docker
Docker is a tool designed to make it easier to create, deploy, and run applications by using containers. Containers allow a developer to package up an application with all of the parts it needs, such as libraries and other dependencies, and ship it all out as one package. By doing so, thanks to the container, the developer can rest assured that the application will run on any other Linux machine regardless of any customized settings that machine might have that could differ from the machine used for writing and testing the code.In a way, Docker is a bit like a virtual machine. But unlike a virtual machine, rather than creating a whole virtual operating system, Docker allows applications to use the same Linux kernel as the system that they’re running on and only requires applications be shipped with things not already running on the host computer. This gives a significant performance boost and reduces the size of the application.
Docker Clusters comprises of two major parts:
Manager Nodes: They deal with management of clusters including maintaining the state of clusters, preparation of services, and servicing swarm mode endpoints (HTTP API). A key feature in the manager quorum that store critical data about the Swarm cluster.
Worker Nodes: These execute containers. They are not involved in scheduling decisions. A Worker node must have no less than one Manager Node. It’s possible to upgrade a worker node to a Manager node when a latter is under maintenance.
Before you start, make sure your repository system is up-to-date. Use the command below to update it:
sudo apt-get update -y && sudo apt-get upgrade -y
Once your system is updated with the current repository system, restart your machine to apply these updates.
Step 1: Installing Docker
Install Docker machine on each of the nodes. Since Docker Swarm is doesn’t exist in the default mode of Ubuntu version default, you need to run it first.
Run the command below to install the necessary packages:
sudo apt-get install apt-transport-https software-properties-common ca-certificates -y
Don’t forget to include the GPG key for your Docker’s application:
://download.docker.com/linux/ubuntu/gpg && sudo apt-key add gpgwget https
Also, include the Docker Swarm repository then update the system:
[arch=amd64]sudo echo "deb- https://download.docker.com/linux/ubuntu xenial stable" >>
- /etc/apt/sources.list
sudo apt-get update -y
Lastly, use command below to install the Docker engine:
sudo apt-get install docker-ce -y
Once the installation of Docker engine is done, run the Docker and let it run within the boot time:
sudo systemctl start docker && sudo systemctl enable docker
In its default mode, Docker daemon can only run as the system’s root user, so other users cannot access it unless they use sudo. To run your Docker without sudo, you need to create a Uniform group known as docker then add the number of users you want. Run the command below to make the process successful:
sudo groupadd docker && sudo usermod -aG docker dockeruser
Log out the system then log in to updates your membership. Run the command on individually for each node.
Step 2: Configuring firewall
A specific cluster should have at least one node that acts as a Manager nodes, but for a smooth process, three managers should be used. Let’s takes the first node as the Swarm manager while the remaining two nodes will represent the worker nodes.
Next, you need to open network ports on these nodes to make part of a cluster that will make the application function properly. So, using the UFW firewall allow access to the following ports 80, 2377, 2376, 2376, 4789, and 7946. Then run the command below:
2376/tcp && sudo ufw allow 7946/udp &&sudo ufw allow
7946/tcp && sudo ufw allow 80/tcp &&sudo ufw allow
2377/tcp && sudo ufw allow 4789/udpsudo ufw allow
Now, reload the firewall and set it up to start once it boots:
sudo ufw reload && sudo ufw enable
Restart your Docker system to apply the new rules:
sudo systemctl restart docker
Step 3: Creating the Docker Cluster
In this case, we have decided that our cluster manager will be node-1, so log in to your node as follows:
- docker-machine ssh node-1
After running this command prompt, the system will change to show that you’re logged into that node. To identify the node as the Swarm manager, run the command below:
- root@node-1:˜# docker swarm init --advertise-addr node_ip_address
In this case, nope_ip_address indicates the node's IP address.
The output should look like this:
To add a worker to this swarm, run the following command:
1-5p5f6p6tv1cmjzq9ntx3zmck9kpgt355qq0uaqoj2ple629dl4-5880qso8jio78djpx5mzbqcfu 192.168.0.103:2377docker swarm join --token SWMTKN-
To add a manager to this swarm, run 'docker swarm join-token manager' and follow the instructions.

This token will be useful in adding nodes to the swarm cluster in the next process. The Docker machine will join the swarm cluster based on the token provided to the command.
Now, go ahead and check the Manager Node status by typing the command below:
docker info
Check to see if the output look something like this:
- Containers: 0
- Running: 0
- Paused: 0
- Stopped: 0
- Images: 0
- Server Version: 17.09.0-ce
- Storage Driver: overlay2
- Backing Filesystem: extfs
- Supports d_type: true
- Native Overlay Diff: true
- Logging Driver: json-file
- Cgroup Driver: cgroupfs
- Plugins:
- Volume: local
- Network: bridge host macvlan null overlay
- Log: awslogs fluentd gcplogs gelf journald json-file logentries splunk syslog
- Swarm: active
- NodeID: iwjtf6u951g7rpx6ugkty3ksa
- Is Manager: true
- ClusterID: fo24c1dvp7ent771rhrjhplnu
- Managers: 1
- Nodes: 1
- Orchestration:
- Task History Retention Limit: 5
- Raft:
- Snapshot Interval: 10000
- Number of Old Snapshots to Retain: 0
- Heartbeat Tick: 1
- Election Tick: 3
- Dispatcher:
- Heartbeat Period: 5 seconds
- CA Configuration:
- Expiry Duration: 3 months
- Force Rotate: 0
- Autolock Managers: false
- Root Rotation In Progress: false
- Node Address: 192.168.0.103
- Manager Addresses:
- 192.168.0.103:2377
- Runtimes: runc
- Default Runtime: runc
- Init Binary: docker-init
- containerd version: 06b9cb35161009dcb7123345749fef02f7cea8e0
- runc version: 3f2f8b84a77f73d38244dd690525642a72156c64
- init version: 949e6fa
- Security Options:
- apparmor
- seccomp
- Profile: default
- Kernel Version: 4.4.0-45-generic
- Operating System: Ubuntu 16.04.1 LTS
- OSType: linux
- Architecture: x86_64
- CPUs: 1
- Total Memory: 992.5MiB
- Name: Manager-Node
- ID: R5H4:JL3F:OXVI:NLNY:76MV:5FJU:XMVM:SCJG:VIL5:ISG4:YSDZ:KUV4
Docker Root Dir: /var/lib/docker- Debug Mode (client): false
- Debug Mode (server): false
- Registry: https://index.docker.io/v1/
- Experimental: false
- Insecure Registries:
- 127.0.0.0/8
- Live Restore Enabled: false
Step 4: Adding Worker Nodes to the Swarm Cluster
Now that the Worker Node is configured, add it to the Cluster.
Start by connecting to node-2 from your local machine:
- $ docker-machine ssh node-2
Then complete the command with the text your_swarm_token being the token you received when the cluster was created, while manager_node_ip_address represents the IP address of the Swarm manager:

Once the command is successfully executed, you will see the output below:

Log out of the node-2, and log into the Manager Node and then run the command below to list:
docker node ls
The Worker Node should look like this:

Step 5: Launch Services in the Docker Swarm
Now that you have installed Docker Swarm successfully, it’s time to test container and see how the Swarm Manager handles it.
So, on your Manager Node, set up a web service with the following command:
80:80 httpddocker service create --name webserver -p
In this command, we intend to map port 80 in the container to port 80 on the cluster to gain full access to the default mode on Apache server.
Check the service is running by typing this command:
docker service ls
You should see an output like this:
ID NAME MODE REPLICAS IMAGE PORTS
nnt7i1lipo0h webserver replicated 0/1 apache:latest *:80->80/tcp
nnt7i1lipo0h webserver replicated 0/1 apache:latest *:80->80/tcp
Step 6: Testing Docker Swarm
Now the Apache server should be running smoothly on Manager Node. The web server can be accessed by directing your browser to http://node-1_ip-address.
You should see the following output:

Now Apache server is available on each node.
Docker Service can scale a service. To test for the server’s high availability, stop running Docker on the Worker Node:
sudo systemctl stop docker
Use the following command to determine the Apache Server status:
docker service ps webserver
A fresh container on the Manager Node should be launched with the following output:
- ID NAME IMAGE NODE DESIRED STATE CURRENT STATE ERROR PORTS
- ia2qc8a5f5n4 webserver.1 httpd:latest Manager-Node Ready Ready 1 second ago
- 7roily9zpjvq \_ webserver.1 httpd:latest Worker-Node Shutdown Running 15 seconds ago
- r7nzo325cu73 webserver.2 httpd:latest Manager-Node Running Running 23 minutes ago
Conclusion
Congratulations! you have successfully installed and configured a Docker Swarm cluster . You can now easily scale your application up to a thousand nodes and fifty thousand containers with no performance degradation. Now that you have a basic cluster set up, head over to theDocker Swarm documentation

Why do we want a Container Orchestration System?
To keep this simple, imagine that you had to run hundreds of containers. You can easily see that if they are running in a distributed mode, there are multiple features that you will need from a management angle to make sure that the cluster is up and running, is healthy and more.
Some of these necessary features include:
- Health Checks on the Containers
- Launching a fixed set of Containers for a particular Docker image
- Scaling the number of Containers up and down depending on the load
- Performing rolling update of software across containers
- and more…
Let us look at how we can do some of that using Docker Swarm. The Docker Documentation and tutorial for trying out Swarm mode has been excellent.
Pre-requisites
- You are familiar with basic Docker commands
- You have installed on your system
- You have the Docker version 1.12 atleast
Create Docker Machines
The first step is to create a set of Docker machines that will act as nodes in our Docker Swarm. I am going to create 6 Docker Machines, where one of them will act as the Manager (Leader) and the other will be worker nodes. You can create less number of machines as needed.
I use the standard command to create a Docker Machine named manager1 as shown below:
docker-machine create --driver hyperv manager1
Keep in mind that I am doing this on Windows 10, which uses the native Hyper-V manager so that’s why I am using that driver. If you are using the Docker Toolbox with Virtual Box, it would be something like this:
docker-machine create --driver virtualbox manager1
Similarly, create the other worder nodes. In my case, as mentioned, I have created 5 other worker nodes.
After creating, it is advised that you fire the docker-machine ls command to check on the status of all the Docker machines (I have omitted the DRIVER .
NAME     DRIVER URL                     STATE
manager1 hyperv tcp://192.168.1.8:2376  Running
worker1  hyperv tcp://192.168.1.9:2376  Running
worker2  hyperv tcp://192.168.1.10:2376 Running
worker3  hyperv tcp://192.168.1.11:2376 Running
worker4  hyperv tcp://192.168.1.12:2376 Running
worker5  hyperv tcp://192.168.1.13:2376 Running
Note down the IP Address of the manager1, since you will be needing that. I will call that MANAGER_IP in the text later.
One way to get the IP address of the manager1 machine is as follows:
$ docker-machine ip manager1
192.168.1.8
You should be comfortable with doing a SSH into any of the Docker Machines. You will need that since we will primarily be executing the docker commands from within the SSH session to that machine.
Keep in mind that using docker-machine utility, you can SSH into any of the machines as follows:
docker-machine ssh <machine-name>
As an example, here is my SSH into manager1 docker machine.
$ docker-machine ssh manager1
.
## ##        ==
## ## ## ##    ===
           /"""""""""""""""""\___/ ===
      ~~~ {~~ ~~~~ ~~~ ~~~~ ~~~ ~ /  ===- ~~~
           \______ o           __/
             \    \         __/
              \____\_______/
 _                 _   ____     _            _
| |__   ___   ___ | |_|___ \ __| | ___   ___| | _____ _ __
| '_ \ / _ \ / _ \| __| __) / _` |/ _ \ / __| |/ / _ \ '__|
| |_) | (_) | (_) | |_ / __/ (_| | (_) | (__|   <  __/ |
|_.__/ \___/ \___/ \__|_____\__,_|\___/ \___|_|\_\___|_|
Boot2Docker version 1.12.1, build HEAD : ef7d0b4 - Thu Aug 18 21:18:06 UTC 2016
Docker version 1.12.1, build 23cf638
docker@manager1:~$
Our Swarm Cluster
Now that our machines are setup, we can proceed with setting up the Swarm.
The first thing to do is initialize the Swarm. We will SSH into the manager1 machine and initialize the swarm in there.
$ docker-machine ssh manager1
This will initialize the SSH session and you should be at prompt as shown below:
$ docker-machine ssh manager1
.
## ##        ==
## ## ## ##    ===
           /"""""""""""""""""\___/ ===
      ~~~ {~~ ~~~~ ~~~ ~~~~ ~~~ ~ /  ===- ~~~
           \______ o           __/
             \    \         __/
              \____\_______/
 _                 _   ____     _            _
| |__   ___   ___ | |_|___ \ __| | ___   ___| | _____ _ __
| '_ \ / _ \ / _ \| __| __) / _` |/ _ \ / __| |/ / _ \ '__|
| |_) | (_) | (_) | |_ / __/ (_| | (_) | (__|   <  __/ |
|_.__/ \___/ \___/ \__|_____\__,_|\___/ \___|_|\_\___|_|
Boot2Docker version 1.12.1, build HEAD : ef7d0b4 - Thu Aug 18 21:18:06 UTC 2016
Docker version 1.12.1, build 23cf638
docker@manager1:~$
Perform the following steps:
$ docker swarm init --advertise-addr MANAGER_IP
On my machine, it looks like this:
docker@manager1:~$ docker swarm init — advertise-addr 192.168.1.8
Swarm initialized: current node (5oof62fetd4gry7o09jd9e0kf) is now a manager.To add a worker to this swarm, run the following command:docker swarm join \
 — token SWMTKN-1–5mgyf6ehuc5pfbmar00njd3oxv8nmjhteejaald3yzbef7osl1-ad7b1k8k3bl3aa3k3q13zivqd \
 192.168.1.8:2377To add a manager to this swarm, run ‘docker swarm join-token manager’ and follow the instructions.docker@manager1:~$
Great!
You will also notice that the output mentions the docker swarm join command to use in case you want another node to join as a worker. Keep in mind that you can have a node join as a worker or as a manager. At any point in time, there is only one LEADER and the other manager nodes will be as backup in case the current LEADER opts out.
At this point you can see your Swarm status by firing the following command as shown below:
docker@manager1:~$ docker node ls
ID              HOSTNAME STATUS AVAILABILITY MANAGER STATUS
5oof62fetd..*   manager1 Ready  Active       Leader
This shows that there is a single node so far i.e. manager1 and it has the value of Leader for the MANAGER column.
Stay in the SSH session itself for manager1.
Joining as Worker Node
To find out what docker swarm command to use to join as a node, you will need to use the join-token <role> command.
To find out the join command for a worker, fire the following command:
docker@manager1:~$ docker swarm join-token worker
To add a worker to this swarm, run the following command:docker swarm join \
 — token SWMTKN-1–5mgyf6ehuc5pfbmar00njd3oxv8nmjhteejaald3yzbef7osl1-ad7b1k8k3bl3aa3k3q13zivqd \
 192.168.1.8:2377docker@manager1:~$
Joining as Manager Node
To find out the the join command for a manager, fire the following command:
docker@manager1:~$ docker swarm join-token manager
To add a manager to this swarm, run the following command:docker swarm join \
 — token SWMTKN-1–5mgyf6ehuc5pfbmar00njd3oxv8nmjhteejaald3yzbef7osl1–8xo0cmd6bryjrsh6w7op4enos \
 192.168.1.8:2377docker@manager1:~$
Notice in both the above cases, that you are provided a token and it is joining the Manager node (you will be able to identify that the IP address is the same the MANAGER_IP address).
Keep the SSH to manager1 open. And fire up other command terminals for working with other worker docker machines.
Adding Worker Nodes to our Swarm
Now that we know how to check the command to join as a worker, we can use that to do a SSH into each of the worker Docker machines and then fire the respective join command in them.
In my case, I have 5 worker machines (worker1/2/3/4/5). For the first worker1 Docker machine, I do the following:
SSH into the worker1 machine i.e. docker-machine ssh worker1- Then fire the respective command that I got for joining as a worker. In my case the output is shown below:
docker@worker1:~$ docker swarm join \
 — token SWMTKN-1–5mgyf6ehuc5pfbmar00njd3oxv8nmjhteejaald3yzbef7osl1-ad7b1k8k3bl3aa3k3q13zivqd \
 192.168.1.8:2377
This node joined a swarm as a worker.
docker@worker1:~$
I do the same thing by launching SSH sessions for worker2/3/4/5 and then pasting the same command since I want all of them to be worker nodes.
After making all my worker nodes join the Swarm, I go back to my manager1 SSH session and fire the following command to check on the status of my Swarm i.e. see the nodes participating in it:
docker@manager1:~$ docker node ls
ID                           HOSTNAME  STATUS  AVAILABILITY  MANAGER STATUS
1ndqsslh7fpquc7fi35leig54    worker4   Ready   Active
1qh4aat24nts5izo3cgsboy77    worker5   Ready   Active
25nwmw5eg7a5ms4ch93aw0k03    worker3   Ready   Active
5oof62fetd4gry7o09jd9e0kf *  manager1  Ready   Active        Leader
5pm9f2pzr8ndijqkkblkgqbsf    worker2   Ready   Active
9yq4lcmfg0382p39euk8lj9p4    worker1   Ready   Active
docker@manager1:~$
As expected, you can see that I have 6 nodes, one as the manager (manager1) and the other 5 as workers.
We can also do execute the standard docker info command here and zoom into the Swarm section to check out the details for our Swarm.
Swarm: active
 NodeID: 5oof62fetd4gry7o09jd9e0kf
 Is Manager: true
 ClusterID: 6z3sqr1aqank2uimyzijzapz3
 Managers: 1
 Nodes: 6
 Orchestration:
  Task History Retention Limit: 5
 Raft:
  Snapshot Interval: 10000
  Heartbeat Tick: 1
  Election Tick: 3
 Dispatcher:
  Heartbeat Period: 5 seconds
 CA Configuration:
  Expiry Duration: 3 months
 Node Address: 192.168.1.8
Notice a few of the properties:
- The Swarm is marked as active. It has 6 Nodes in total and 1 manager among them.
- Since I am running the
command on the manager1 itself, it shows the Is Manager as true.docker info - The Raft section is the Raft consensus algorithm that is used. Check out the details .
Create a Service
Now that we have our swarm up and running, it is time to schedule our containers on it. This is the whole beauty of the orchestration layer. We are going to focus on the app and not worry about where the application is going to run.
All we are going to do is tell the manager to run the containers for us and it will take care of scheduling out the containers, sending the commands to the nodes and distributing it.
To start a service, you would need to have the following:
- What is the Docker image that you want to run. In our case, we will run the standard nginx image that is officially available from the Docker hub.
- We will expose our service on port 80.
- We can specify the number of containers (or instances) to launch. This is specified via the replicas parameter.
- We will decide on the name for our service. And keep that handy.
What I am going to do then is to launch 5 replicas of the nginx container. To do that, I am again in the SSH session for my manager1 node. And I give the following
docker service createdocker service create --replicas 5 -p 80:80 --name web nginxctolq1t4h2o859t69j9pptyye
What has happened is that the Orchestration layer has now got to work.
You can find out the status of the service, by giving the following command:
docker@manager1:~$ docker service ls
ID            NAME  REPLICAS  IMAGE  COMMAND
ctolq1t4h2o8  web   0/5       nginx
This shows that the replicas are not yet ready. You will need to give that command a few times.
In the meanwhile, you can also see the status of the service and how it is getting orchestrated to the different nodes by using the following command:
docker@manager1:~$ docker service ps web
ID  NAME   IMAGE  NODE      DESIRED STATE  CURRENT STATE      ERROR
7i*  web.1  nginx  worker3   Running        Preparing 2 minutes ago
17*  web.2  nginx  manager1  Running        Running 22 seconds ago
ey*  web.3  nginx  worker2   Running        Running 2 minutes ago
bd*  web.4  nginx  worker5   Running        Running 45 seconds ago
dw*  web.5  nginx  worker4   Running        Running 2 minutes ago
This shows that the nodes are getting setup. It could take a while.
But notice a few things. In the list of nodes above, you can see that the 5 containers are being scheduled by the orchestration layer on manager1, worker2, worker3, worker4 and worker5. There is no container scheduled for worker1 node and that is fine.
A few executions of
docker service lsdocker@manager1:~$ docker service ls
ID NAME REPLICAS IMAGE COMMAND
ctolq1t4h2o8 web 3/5 nginx
docker@manager1:~$
and then finally:
docker@manager1:~$ docker service ls
ID              NAME REPLICAS IMAGE COMMAND
ctolq1t4h2o8    web  5/5      nginx
docker@manager1:~$
If we look at the service processes at this point, we can see the following:
docker@manager1:~$ docker service ps web
ID  NAME   IMAGE  NODE      DESIRED STATE  CURRENT STATE      ERROR
7i*  web.1  nginx  worker3   Running        Running 4 minutes ago
17*  web.2  nginx  manager1  Running        Running 7 minutes ago
ey*  web.3  nginx  worker2   Running        Running 9 minutes ago
bd*  web.4  nginx  worker5   Running        Running 8 minutes ago
dw*  web.5  nginx  worker4   Running        Running 9 minutes ago
If you do a
docker psdocker@manager1:~$ docker ps
CONTAINER ID IMAGE COMMAND CREATED STATUS PORTS NAMES
933309b04630 nginx:latest "nginx -g 'daemon off" 2 minutes ago Up 2 minutes 80/tcp, 443/tcp web.2.17d502y6qjhd1wqjle13nmjvc
docker@manager1:~$
Accessing the Service
You can access the service by hitting any of the manager or worker nodes. It does not matter if the particular node does not have a container scheduled on it. That is the whole idea of the swarm.
Try out a curl to any of the Docker Machine IPs (manager1 or worker1/2/3/4/5) or hit the URL (http://<machine-ip>) in the browser. You should be able to get the standard NGINX Home page.


or if we hit the worker IP:

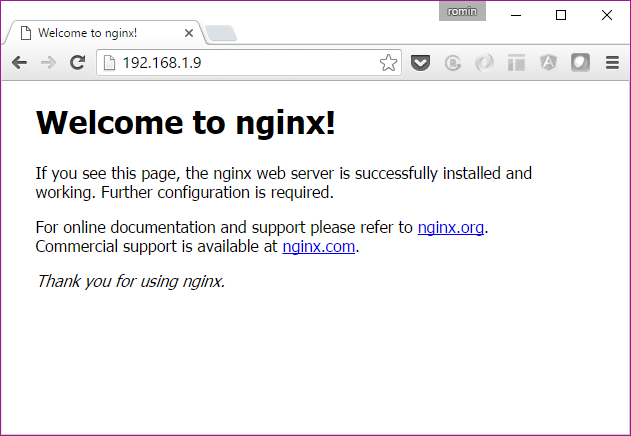
Nice, isn’t it?
Ideally you would put the Docker Swarm service behind a Load Balancer.
Scaling up and Scaling down
This is done via the
docker service scale$ docker service scale web=8web scaled to 8
Now, we can check the status of the service and the process tasks via the same commands as shown below:
docker@manager1:~$ docker service ls
ID           NAME REPLICAS IMAGE COMMAND
ctolq1t4h2o8 web  5/8      nginx
In the ps web command below, you will find that it has decided to schedule the new containers on worker1 (2 of them) and manager1(one of them)
docker@manager1:~$ docker service ps web
ID   NAME   IMAGE  NODE      DESIRED STATE  CURRENT STATE                 ERROR
7i*  web.1  nginx  worker3   Running    Running 14 minutes ago
17*  web.2  nginx  manager1  Running    Running 17 minutes ago
ey*  web.3  nginx  worker2   Running    Running 19 minutes ago
bd*  web.4  nginx  worker5   Running    Running 17 minutes ago
dw*  web.5  nginx  worker4   Running    Running 19 minutes ago8t*  web.6  nginx  worker1   Running    Starting about a minute ago
b8*  web.7  nginx  manager1  Running    Ready less than a second ago
0k*  web.8  nginx  worker1   Running    Starting about a minute ago
We wait for a while and then everything looks good as shown below:
docker@manager1:~$ docker service ls
ID           NAME REPLICAS IMAGE COMMAND
ctolq1t4h2o8 web 8/8 nginxdocker@manager1:~$ docker service ps web
ID  NAME  IMAGE NODE     DESIRED STATE CURRENT STATE ERROR
7i* web.1 nginx worker3  Running       Running 16 minutes ago
17* web.2 nginx manager1 Running       Running 19 minutes ago
ey* web.3 nginx worker2  Running       Running 21 minutes ago
bd* web.4 nginx worker5  Running       Running 20 minutes ago
dw* web.5 nginx worker4  Running       Running 21 minutes ago
8t* web.6 nginx worker1  Running       Running 4 minutes ago
b8* web.7 nginx manager1 Running       Running 2 minutes ago
0k* web.8 nginx worker1  Running       Running 3 minutes agodocker@manager1:~$
Inspecting nodes
You can inspect the nodes anytime via the docker node inspect command.
For example if you are already on the node (for example manager1) that you want to check, you can use the name self for the node.
$ docker node inspect self
Or if you want to check up on the other nodes, give the node name. For e.g.
$ docker node inspect worker1
Draining a node
If the node is ACTIVE, it is ready to accept tasks from the Master i.e. Manager. For e.g. we can see the list of nodes and their status by firing the following command on the manager1 node.
docker@manager1:~$ docker node ls
ID                           HOSTNAME  STATUS  AVAILABILITY  MANAGER STATUS
1ndqsslh7fpquc7fi35leig54    worker4   Ready   Active
1qh4aat24nts5izo3cgsboy77    worker5   Ready   Active
25nwmw5eg7a5ms4ch93aw0k03    worker3   Ready   Active
5oof62fetd4gry7o09jd9e0kf *  manager1  Ready   Active        Leader
5pm9f2pzr8ndijqkkblkgqbsf    worker2   Ready   Active
9yq4lcmfg0382p39euk8lj9p4    worker1   Ready   Active
docker@manager1:~$
You can see that their AVAILABILITY is set to READY.
As per the documentation, When the node is active, it can receive new tasks:
- during a service update to scale up
- during a rolling update
- when you set another node to Drain availability
- when a task fails on another active node
But sometimes, we have to bring the Node down for some maintenance reason. This meant by setting the Availability to Drain mode. Let us try that with one of our nodes.
But first, let us check the status of our processes for the web services and on which nodes they are running:
docker@manager1:~$ docker service ps web
ID                         NAME   IMAGE  NODE      DESIRED STATE  CURRENT STATE           ERROR
7i*  web.1  nginx  worker3   Running        Running 54 minutes ago
17*  web.2  nginx  manager1  Running        Running 57 minutes ago
ey*  web.3  nginx  worker2   Running        Running 59 minutes ago
bd*  web.4  nginx  worker5   Running        Running 57 minutes ago
dw*  web.5  nginx  worker4   Running        Running 59 minutes ago
8t*  web.6  nginx  worker1   Running        Running 41 minutes ago
b8*  web.7  nginx  manager1  Running        Running 39 minutes ago
0k*  web.8  nginx  worker1   Running        Running 41 minutes ago
You find that we have 8 replicas of our service:
- 2 on manager1
- 2 on worker1
- 1 each on worker2, worker3, worker4 and worker5
Now, let us use another command to check what is going on in node worker1.
docker@manager1:~$ docker node ps worker1
ID   NAME   IMAGE  NODE     DESIRED STATE  CURRENT STATE           8t*  web.6  nginx  worker1  Running        Running 44 minutes ago
0k*  web.8  nginx  worker1  Running        Running 44 minutes agodocker@manager1:~$
$ docker node inspect worker1
….."Spec": {
 "Role": "worker",
 "Availability": "active"
 },
…
or
docker@manager1:~$ docker node inspect — pretty worker1
ID: 9yq4lcmfg0382p39euk8lj9p4
Hostname: worker1
Joined at: 2016–09–16 08:32:24.5448505 +0000 utc
Status:
 State: Ready
 Availability: Active
Platform:
 Operating System: linux
 Architecture: x86_64
Resources:
 CPUs: 1
 Memory: 987.2 MiB
Plugins:
 Network: bridge, host, null, overlay
 Volume: local
Engine Version: 1.12.1
Engine Labels:
 — provider = hypervdocker@manager1:~$
We can see that it is “Active” for its Availability attribute.
Now, let us set the Availability to DRAIN. When we give that command, the Manager will stop tasks running on that node and launches the replicas on other nodes with ACTIVE availability.
Now, let us set the Availability to DRAIN. When we give that command, the Manager will stop tasks running on that node and launches the replicas on other nodes with ACTIVE availability.
So what we are expecting is that the Manager will bring the 2 containers running on worker1 and schedule them on the other nodes (manager1 or worker2 or worker3 or worker4 or worker5).
This is done by updating the node by setting its availability to “drain”.
docker@manager1:~$ docker node update --availability drain worker1
worker1
Now, if we do a process status for the service, we see an interesting output (I have trimmed the output for proper formatting):
docker@manager1:~$ docker service ps web
ID   NAME       IMAGE  NODE      DESIRED STATE  CURRENT STATE
7i*  web.1      nginx  worker3   Running   Running about an hour ago
17*  web.2      nginx  manager1  Running   Running about an hour ago
ey*  web.3      nginx  worker2   Running   Running about an hour ago
bd*  web.4      nginx  worker5   Running   Running about an hour ago
dw*  web.5      nginx  worker4   Running   Running about an hour ago
2u*  web.6      nginx  worker4   Running   Preparing about a min ago
8t*   \_ web.6  nginx  worker1   Shutdown  Shutdown about a min ago
b8*  web.7      nginx  manager1  Running   Running 49 minutes ago
7a*  web.8      nginx  worker3   Running   Preparing about a min ago
0k*   \_ web.8  nginx  worker1   Shutdown  Shutdown about a min agodocker@manager1:~$
You can see that the containers on worker1 (which we have asked to be drained) are being rescheduled on other workers. In our scenario above, they got scheduled to worker2 and worker3 respectively. This is required because we have asked for 8 replicas to be running in an earlier scaling exercise.
You can see that the two containers are still in “Preparing” state and after a while if you run the command, they are all running as shown below:
docker@manager1:~$ docker service ps web
ID  NAME       IMAGE  NODE      DESIRED STATE  CURRENT STATE
7i*  web.1      nginx  worker3   Running   Running about an hour ago
17*  web.2      nginx  manager1  Running   Running about an hour ago
ey*  web.3      nginx  worker2   Running   Running about an hour ago
bd*  web.4      nginx  worker5   Running   Running about an hour ago
dw*  web.5      nginx  worker4   Running   Running about an hour ago
2u*  web.6      nginx  worker4   Running   Running 8 minutes ago
8t*   \_ web.6  nginx  worker1   Shutdown  Shutdown 8 minutes ago
b8*  web.7      nginx  manager1  Running   Running 56 minutes ago
7a*  web.8      nginx  worker3   Running   Running 8 minutes ago
0k*   \_ web.8  nginx  worker1   Shutdown  Shutdown 8 minutes ago
This makes for cool demo, isn’t it?
Remove the Service
You can simply use the service rm command as shown below:
docker@manager1:~$ docker service rm web
webdocker@manager1:~$ docker service ls
ID NAME REPLICAS IMAGE COMMANDdocker@manager1:~$ docker service inspect web
[]
Error: no such service: web
Applying Rolling Updates
This is straight forward. In case you have an updated Docker image to roll out to the nodes, all you need to do is fire an service update command.
For e.g.
$ docker service update --image <imagename>:<version> web